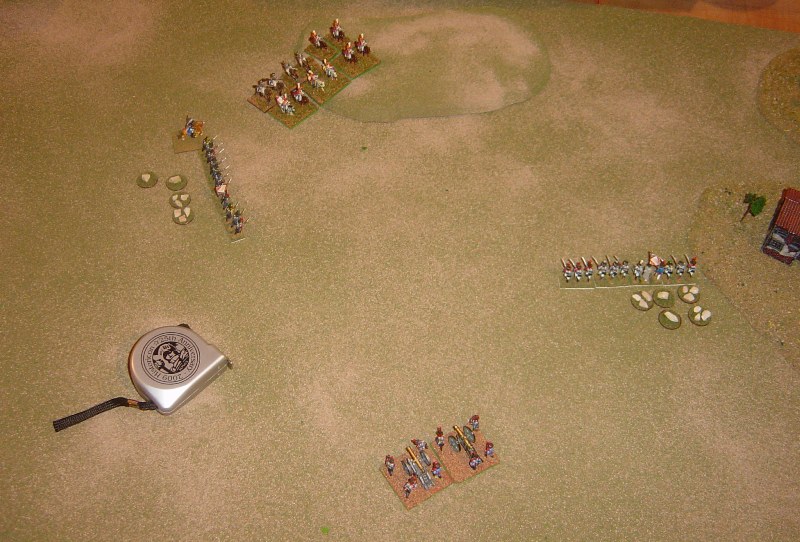
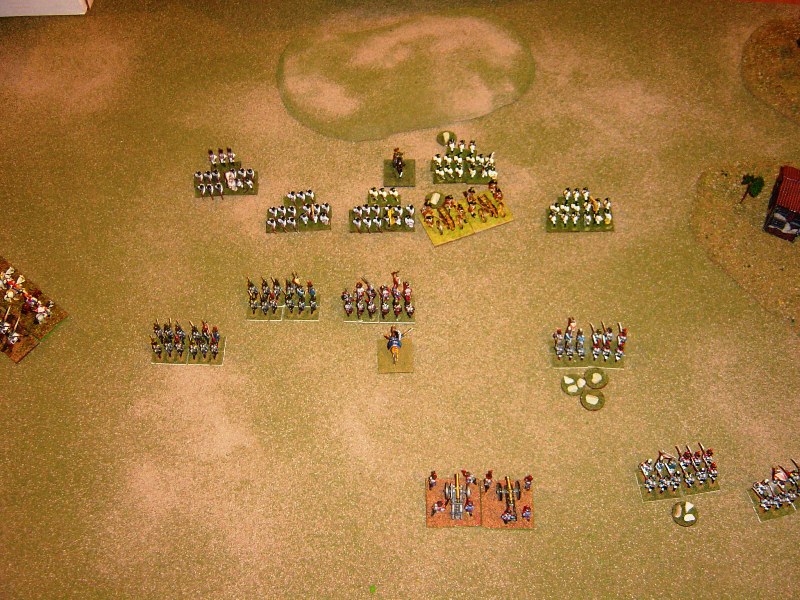
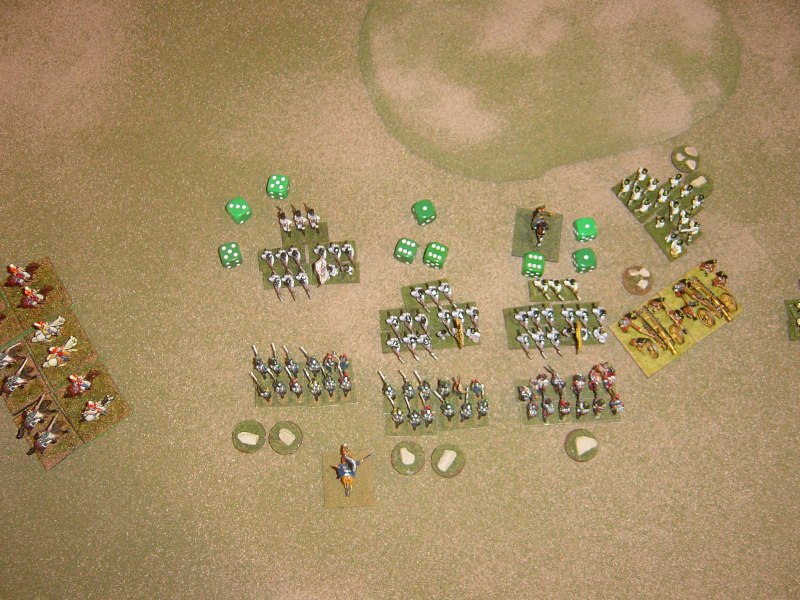
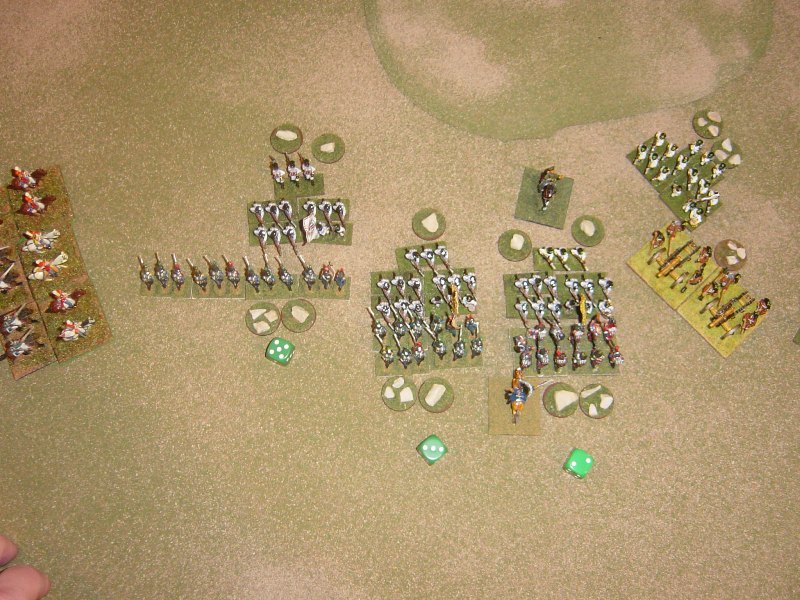
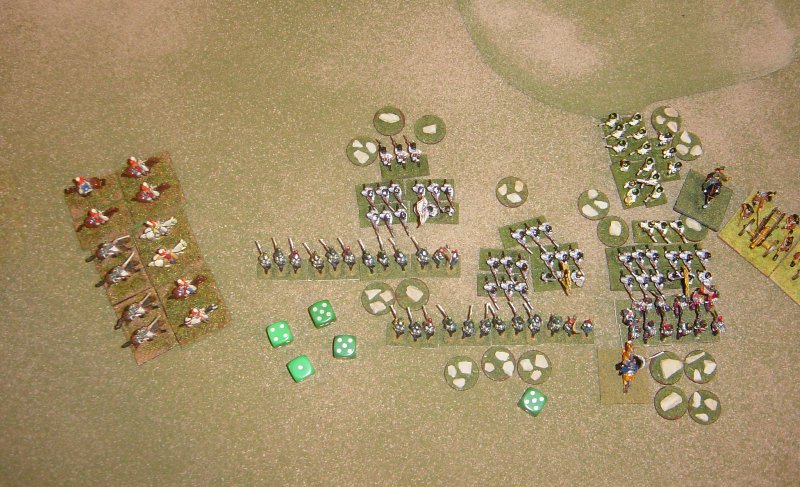
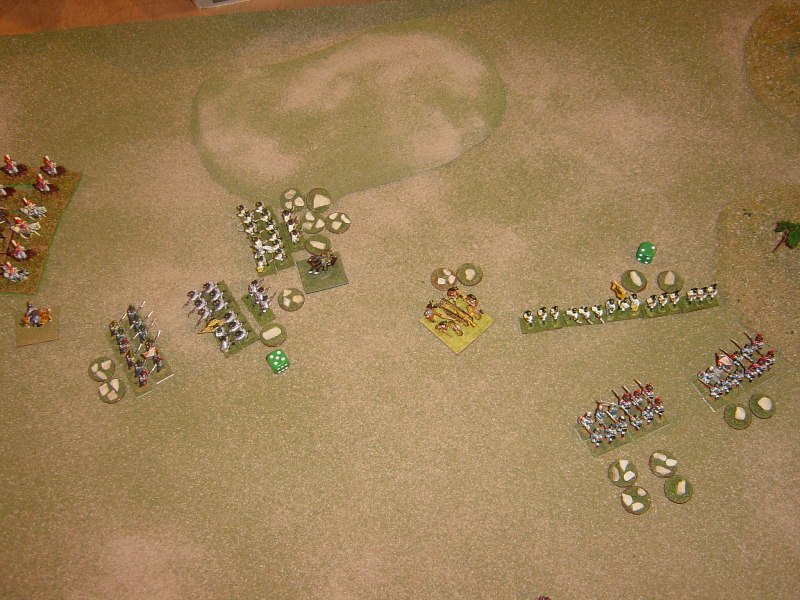
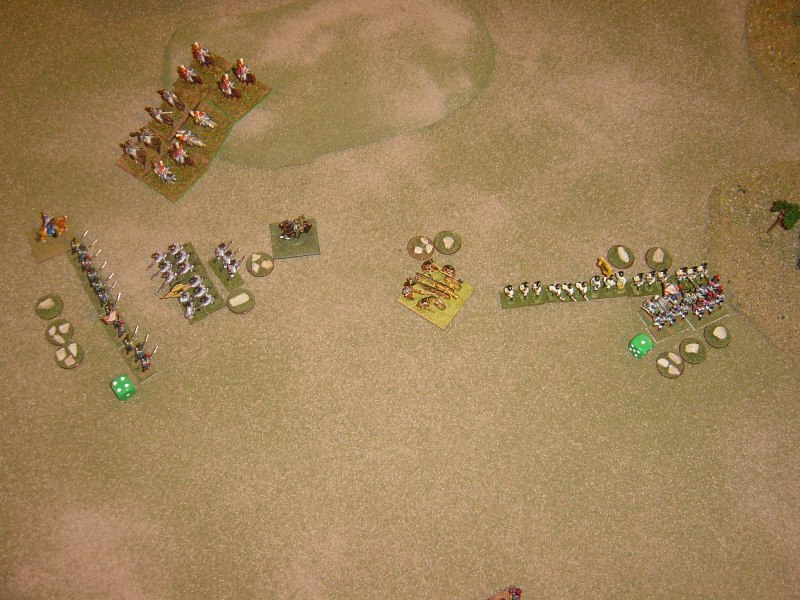
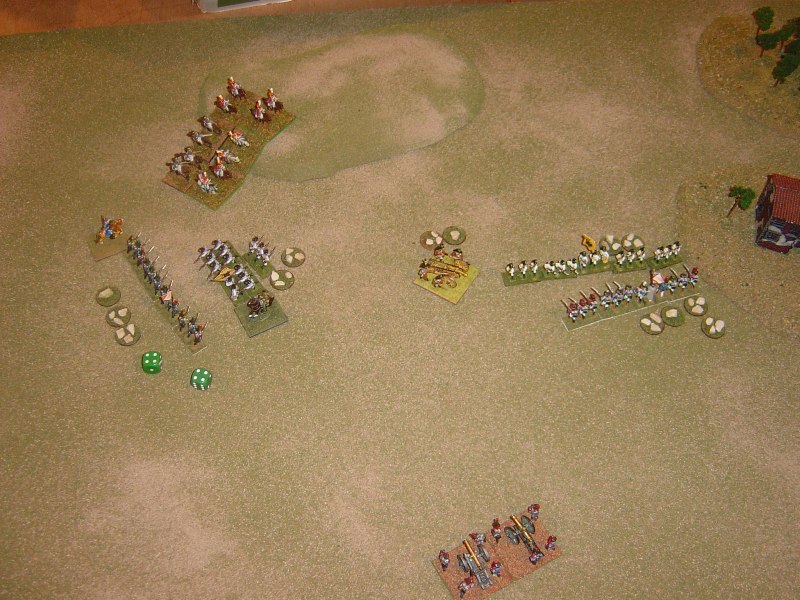
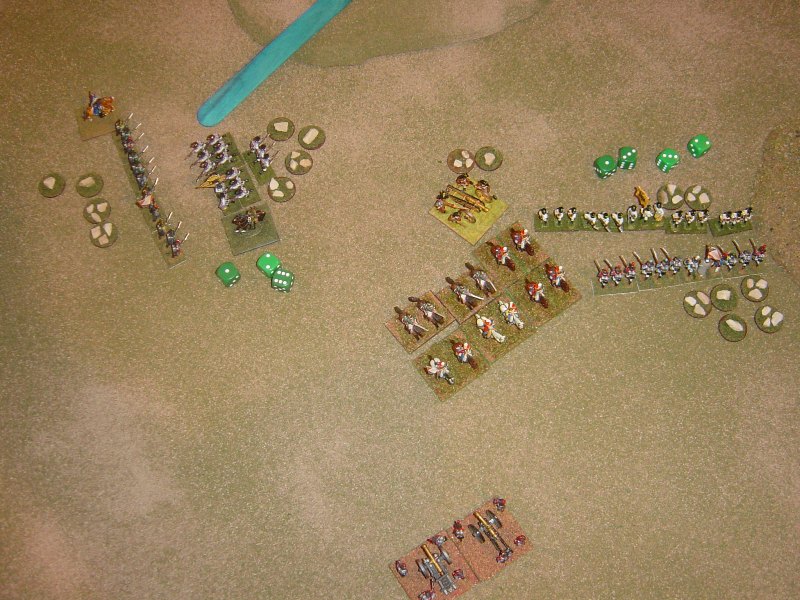
The Austrians had five battalions of infantry supported by an artillery battery.
The French had a brigade with six battalions of infantry,
supported by artillery and a Hussar regiment.
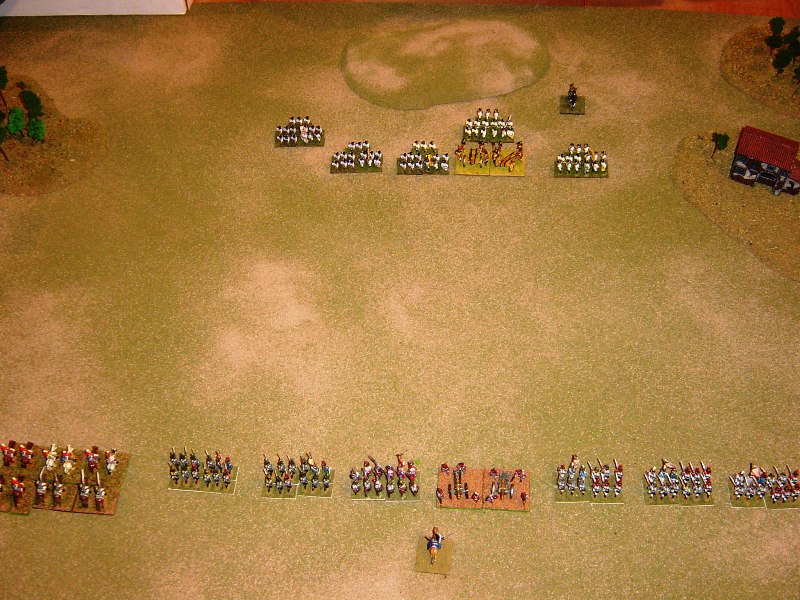
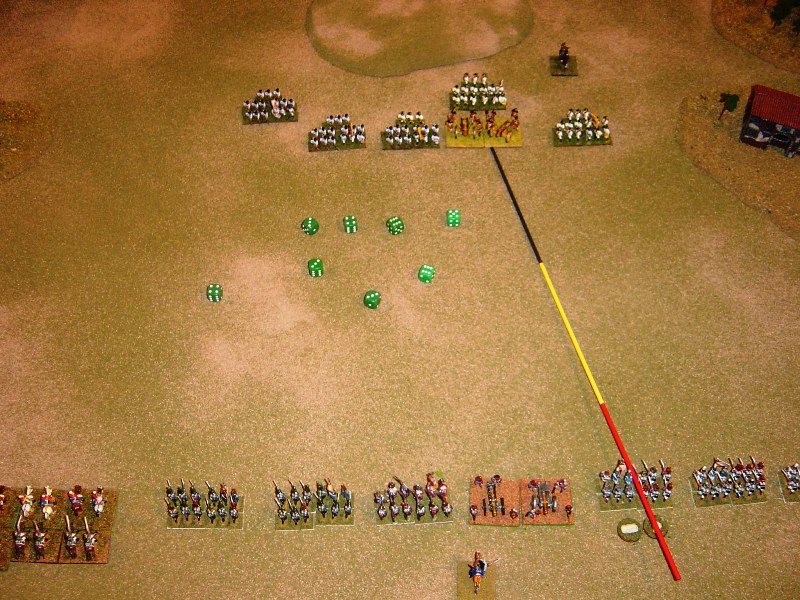
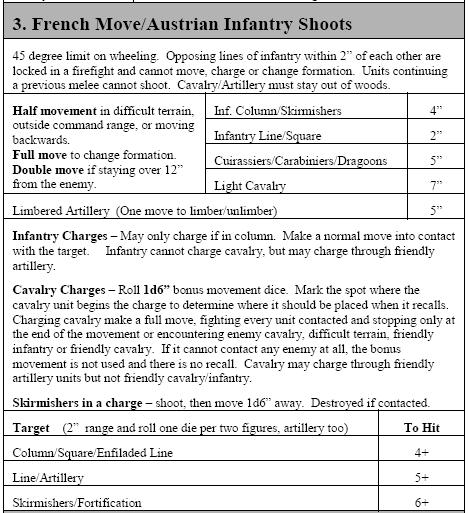
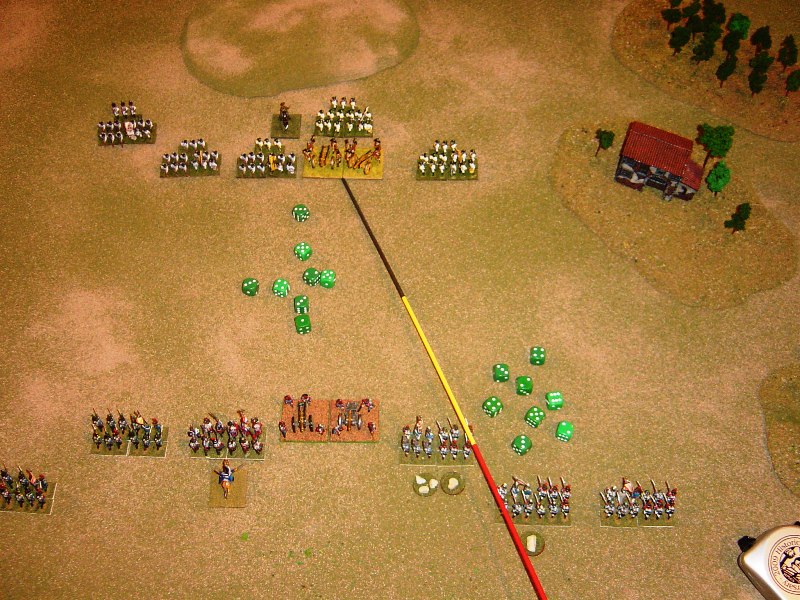
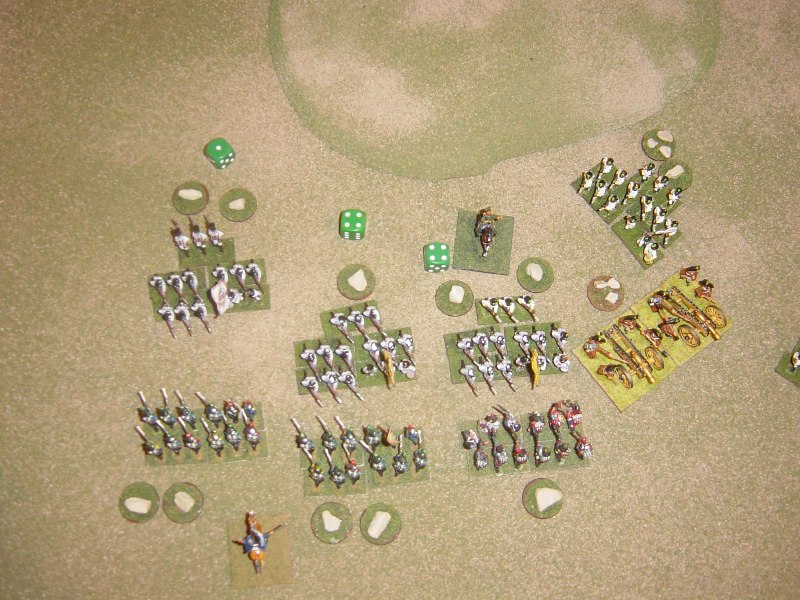
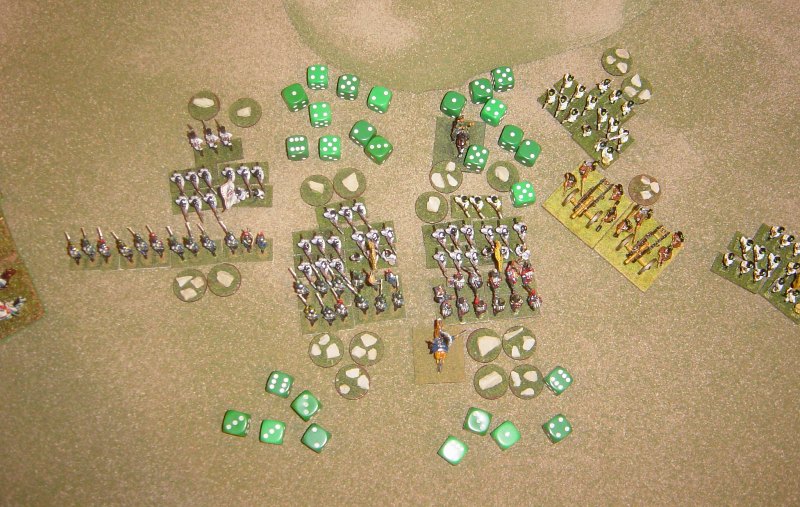
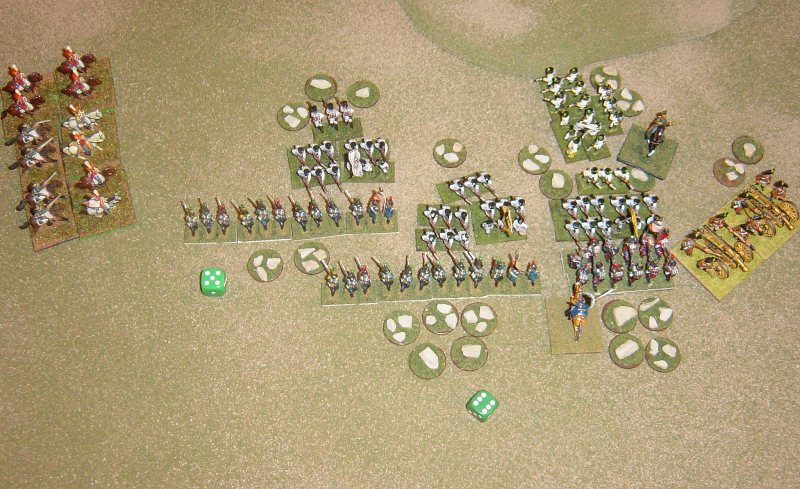
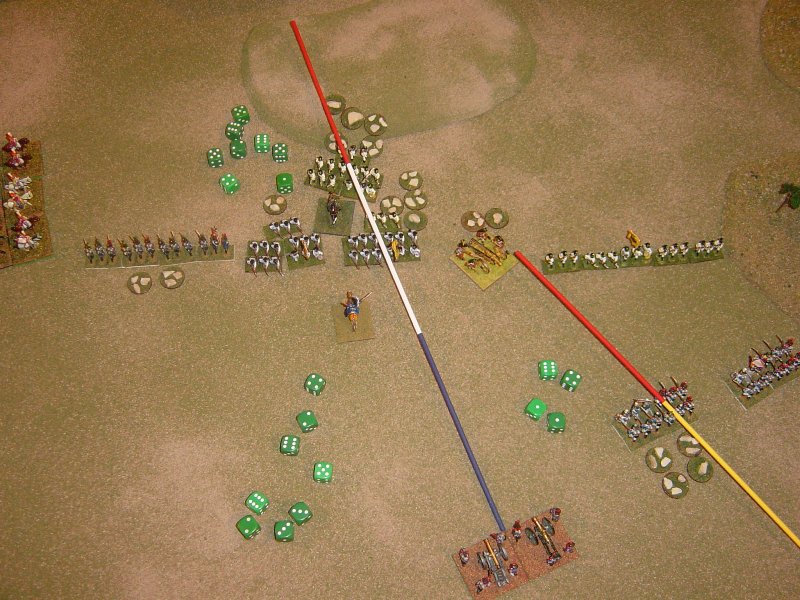
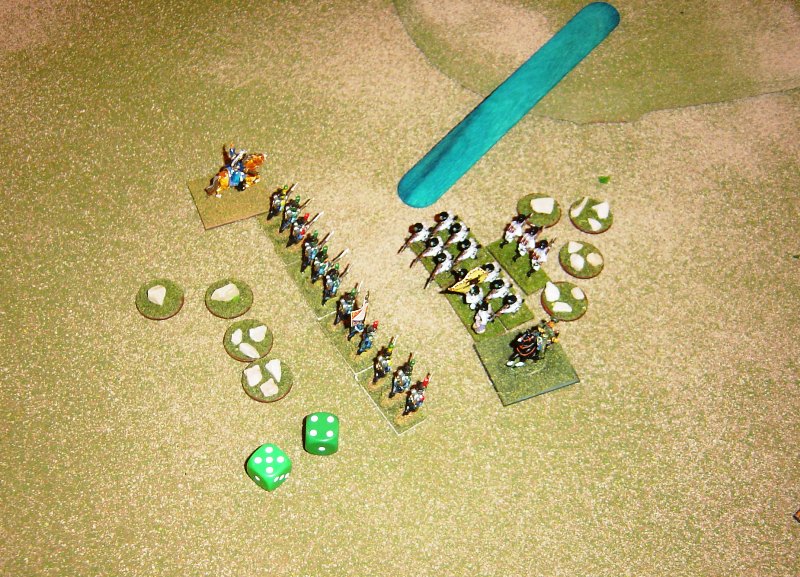
Opening setup. The French are attacking.
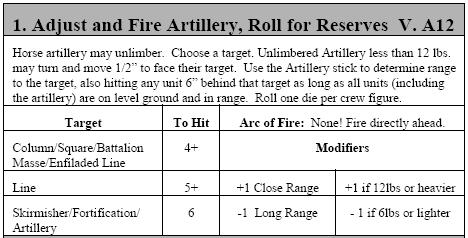
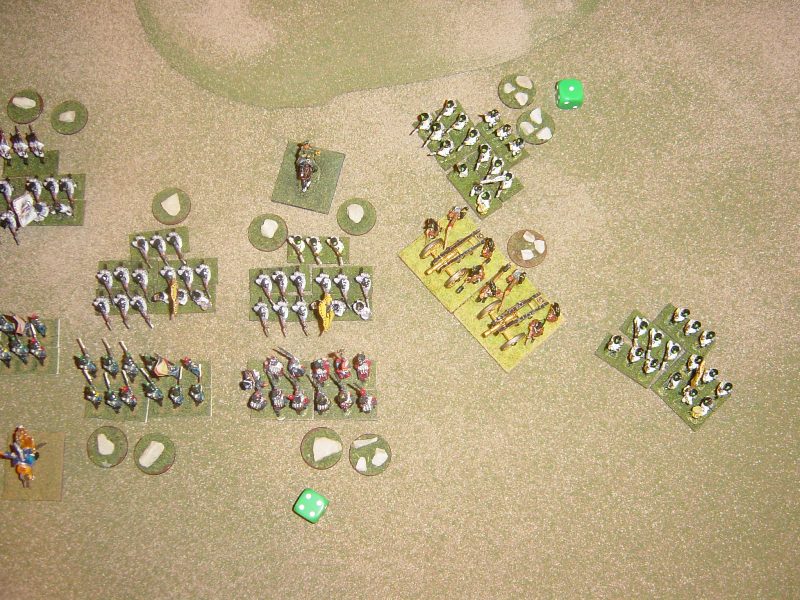
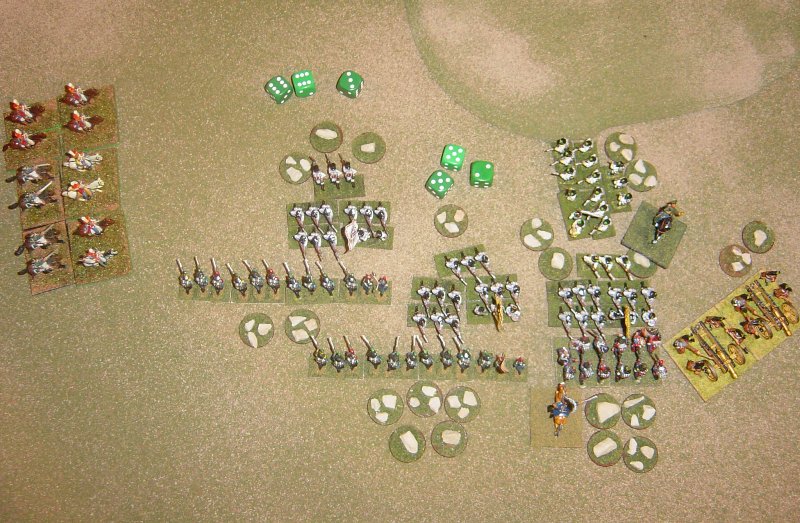
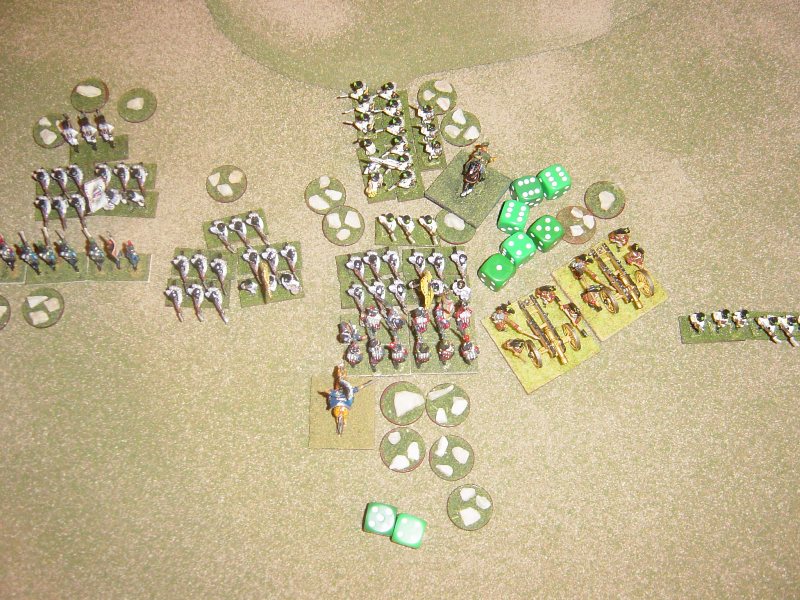
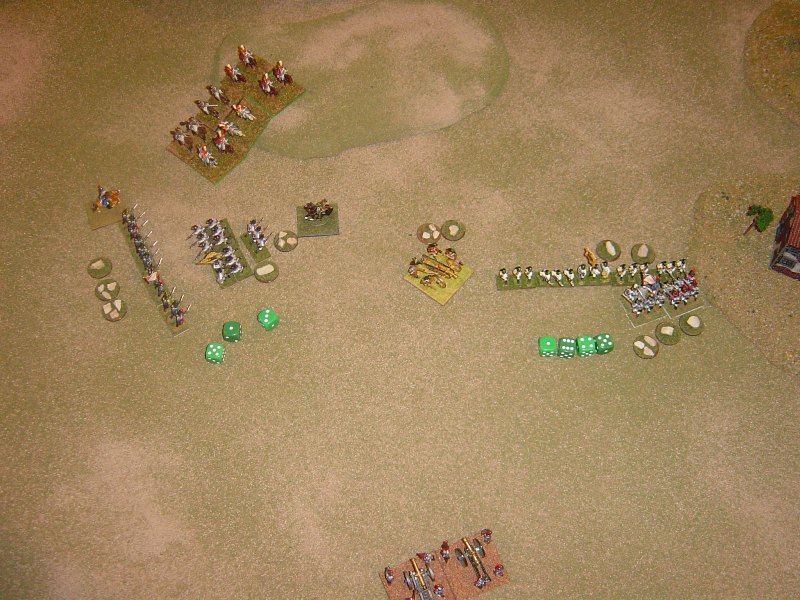
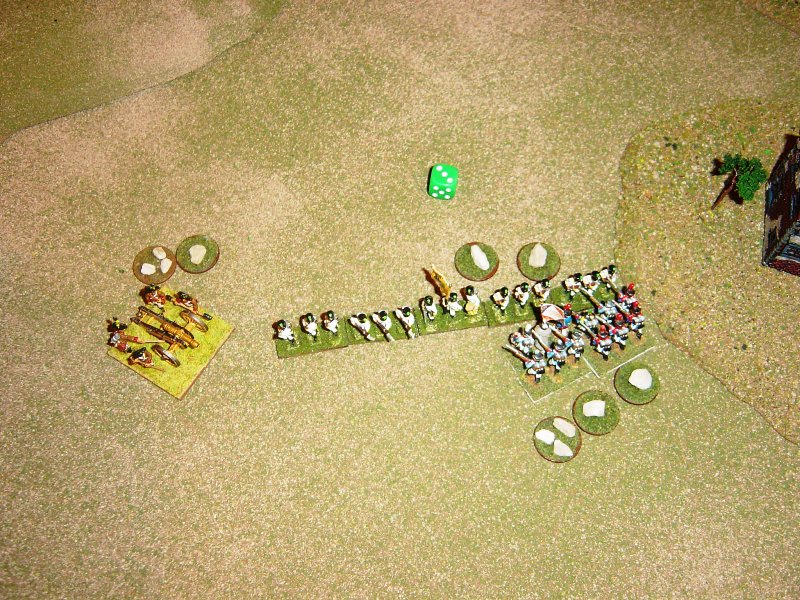
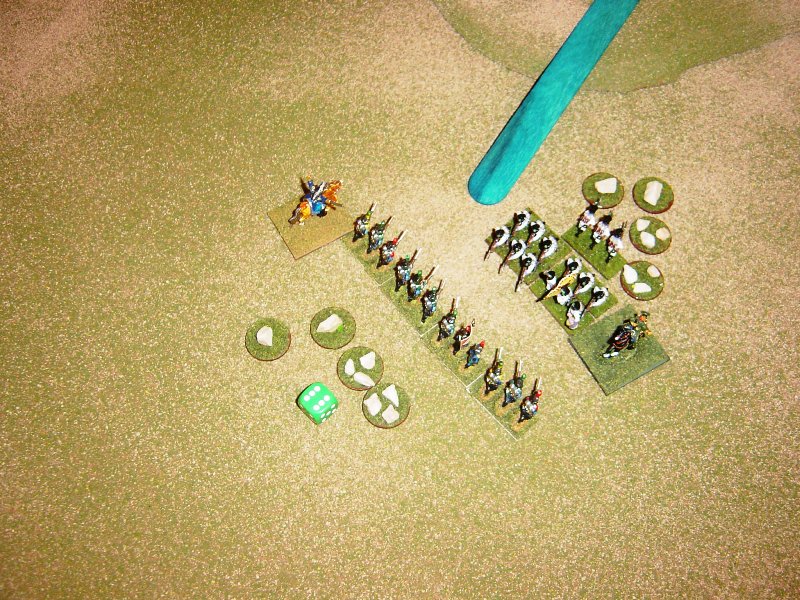
The Austrian artillery fires on one of the French attack columns.
Six pounders at long range on a column need a "6" to hit.
(4+ for target in column, -1 for long range, -1 for 6 pounders firing)
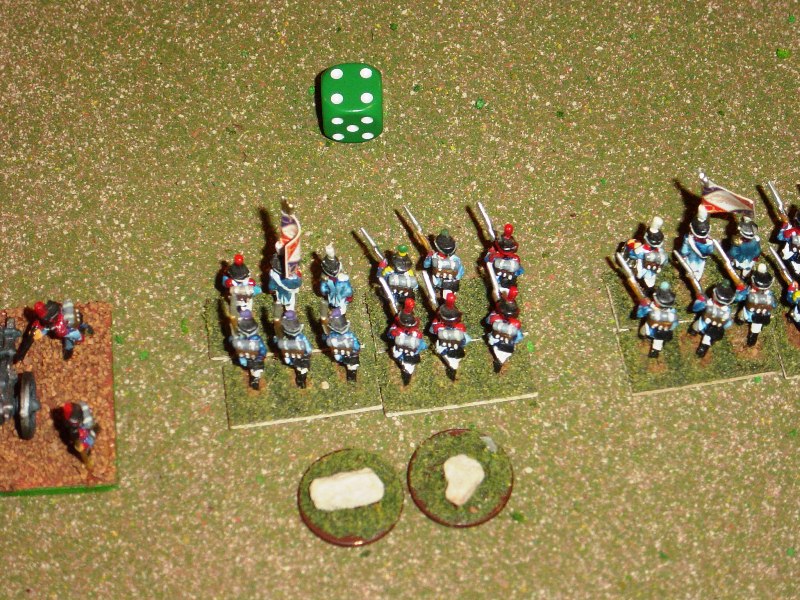
Two sixes is two hits, marked with little rocks.
The French guns do not fire as they are limbered.
(If they were horse artillery, they could unlimber and fire)
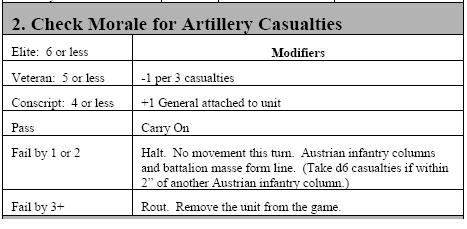
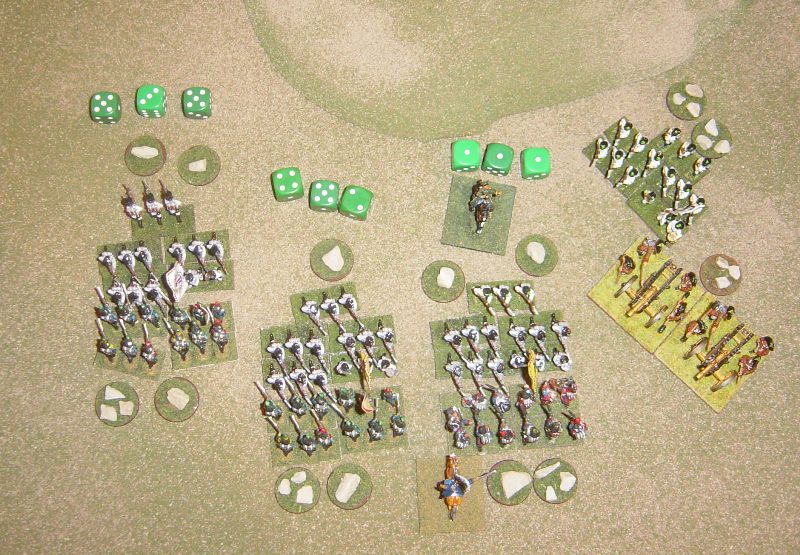
The French infantry hit by artillery test morale.
A roll of "4" passes the test.
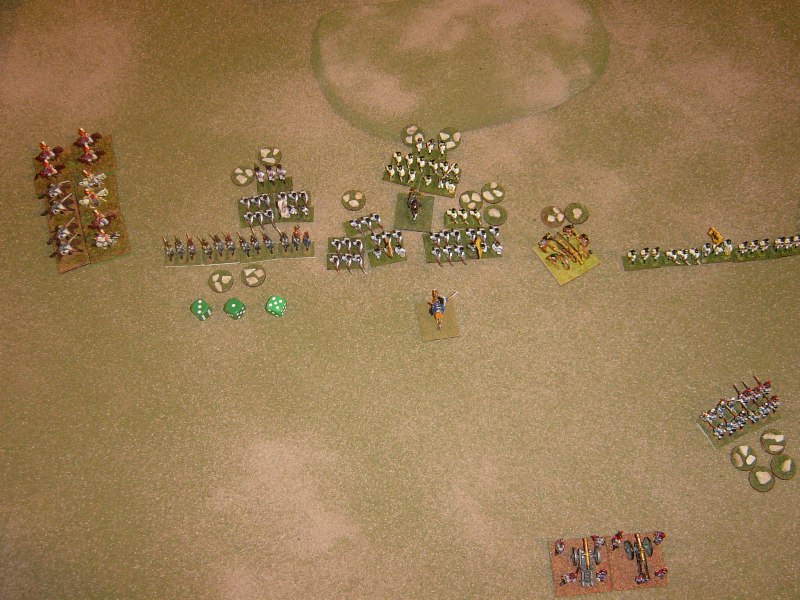
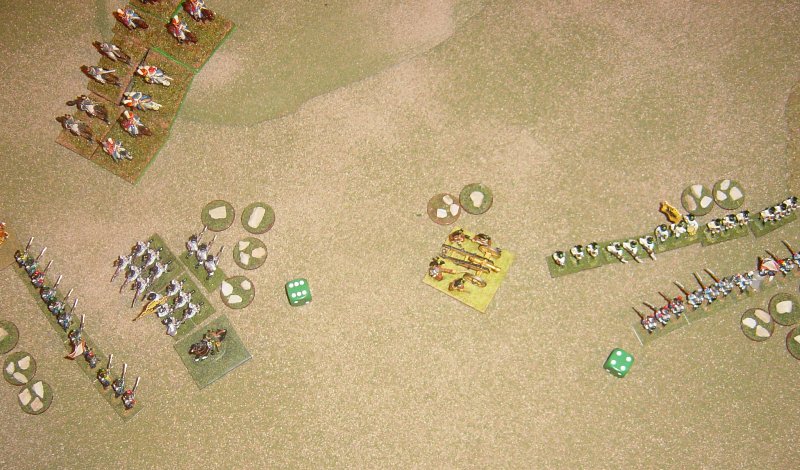
The French advance. Some of the units are outside of command range,
and move half speed. The Austrians are not close enough to fire muskets.
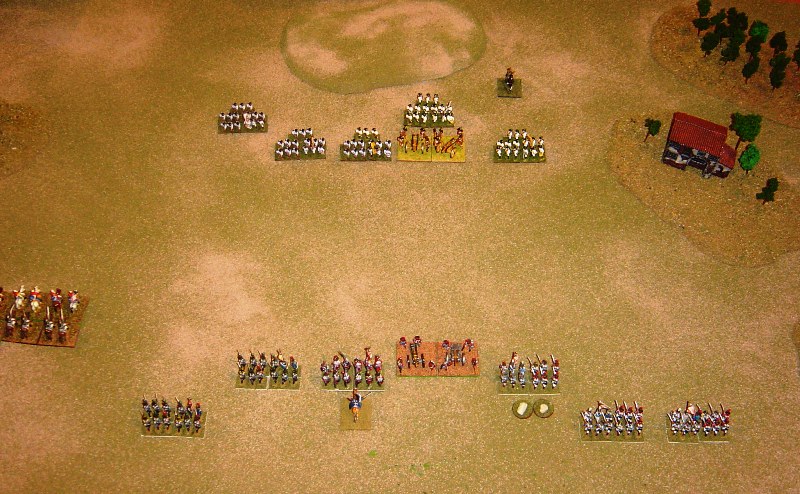
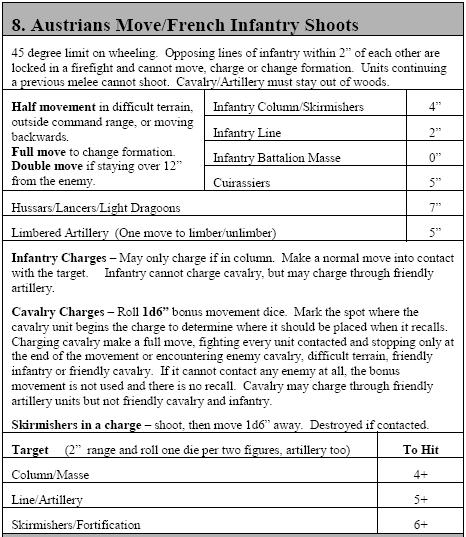
With no charges happening, we move directly to step 8.
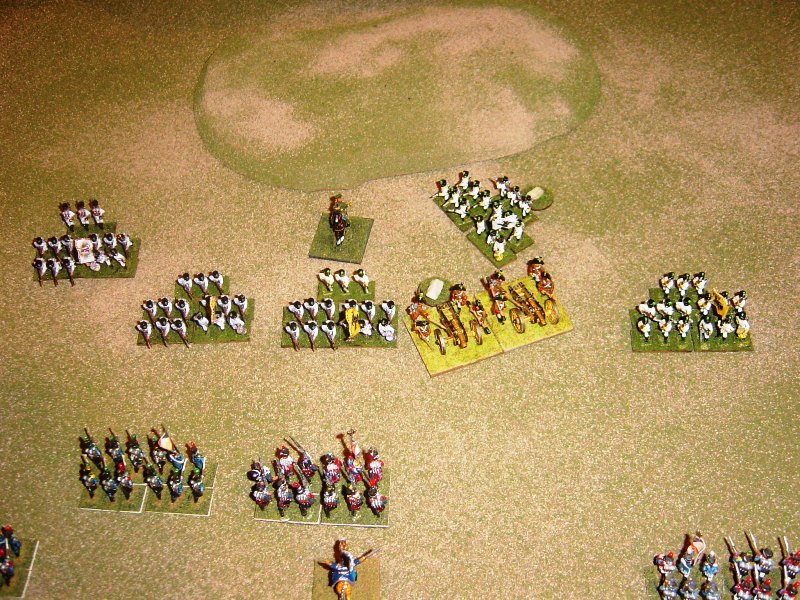
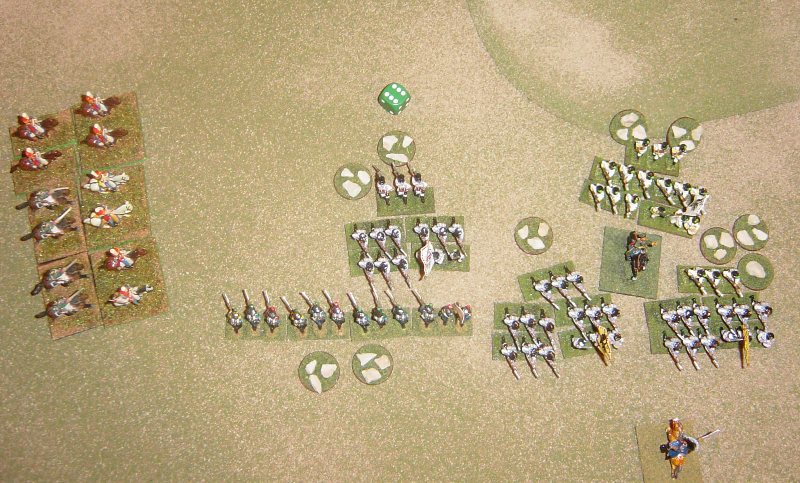
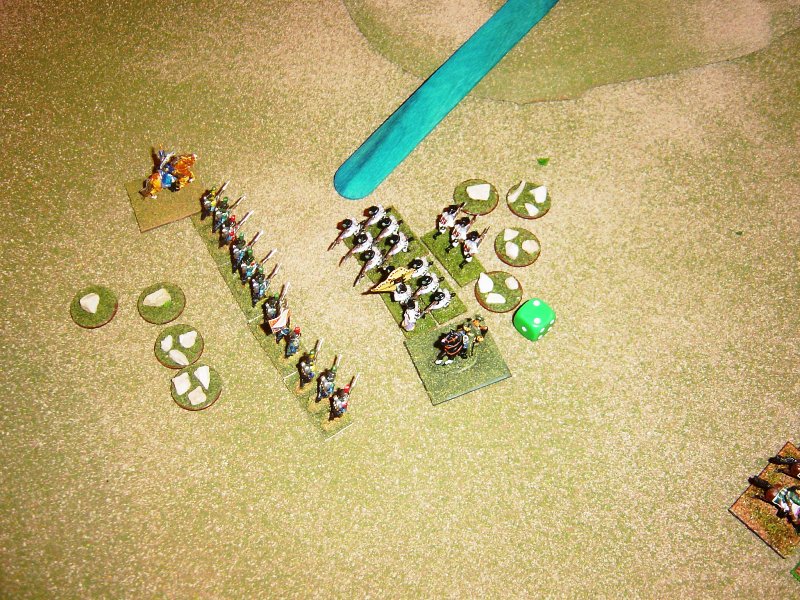
The only Austrian movement is one battalion forming 'Masse' to
defend against an anticipated French cavalry attack.
Still with no charges, we move back to Step 1.
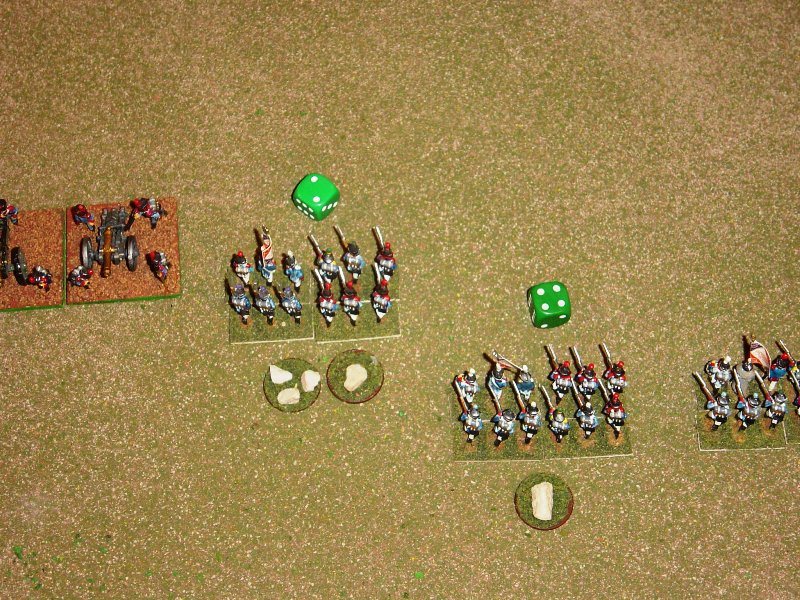
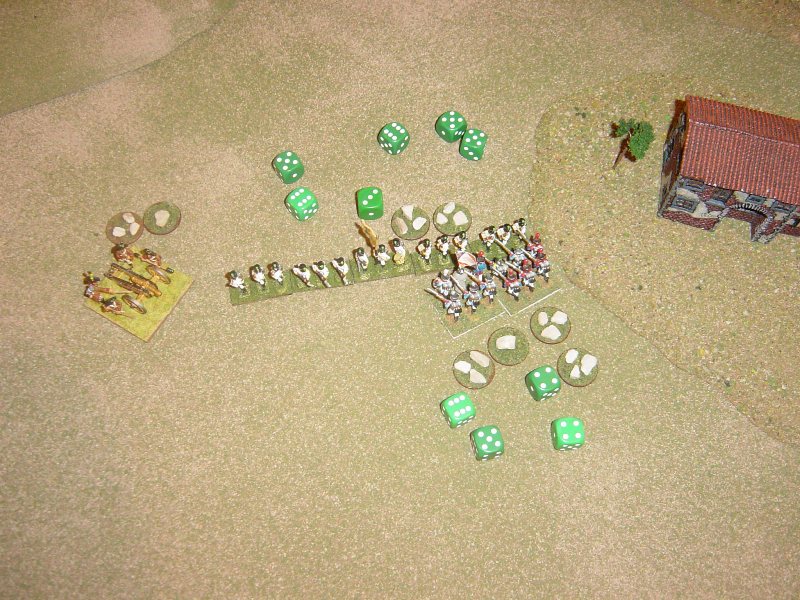
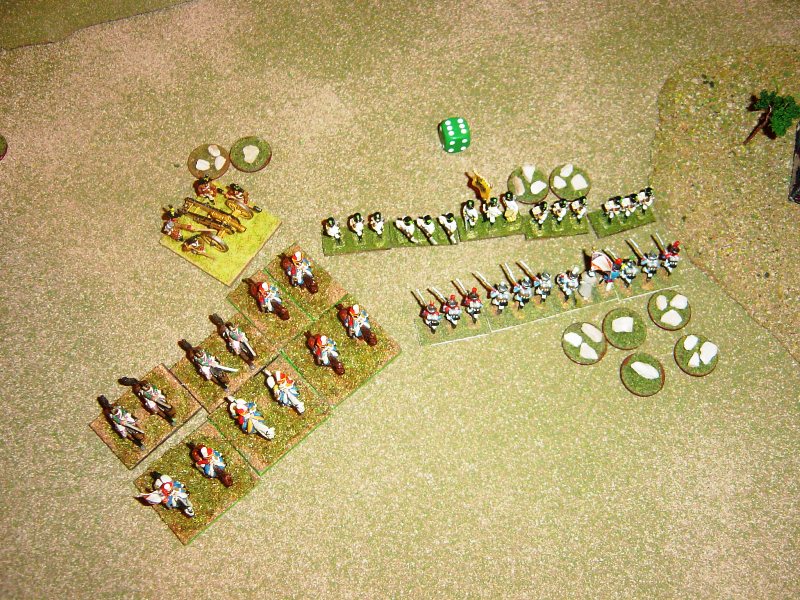
The Austrian artillery is much more effective, hitting two French battalions.
The first target is in medium range and it takes "5+" to hit - for two more hits.
The second target is at long range and needs a "6"....one hit.
Both French battalions pass morale for being hit by artillery.
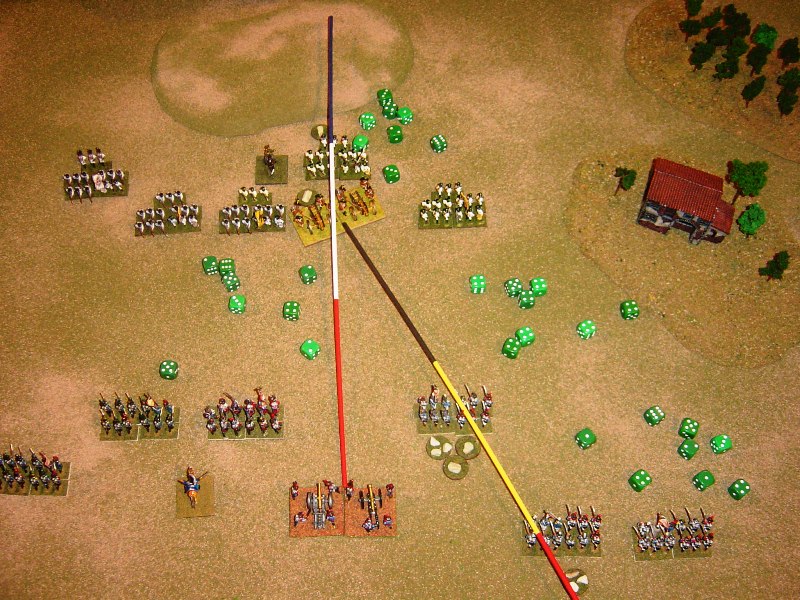
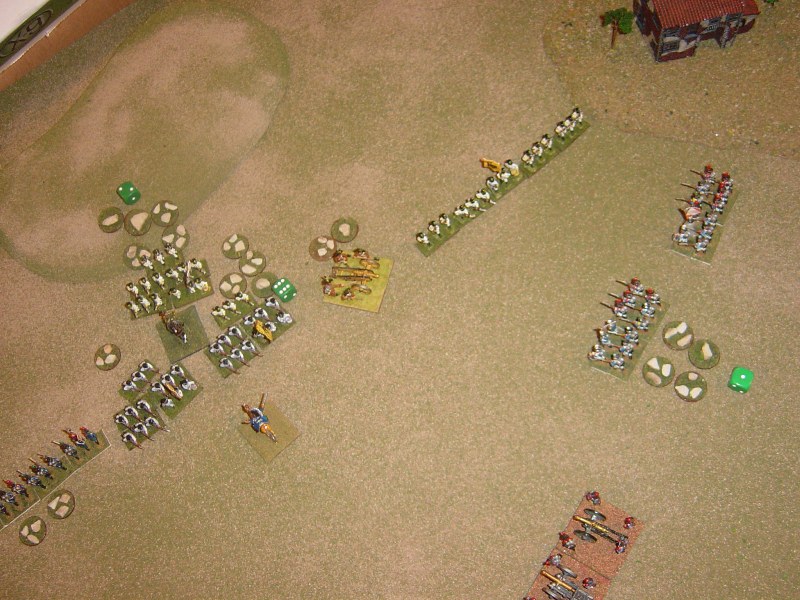
The French continue to advance, with the units outside of command falling behind.
This would not be an issue if they were advancing in waves.
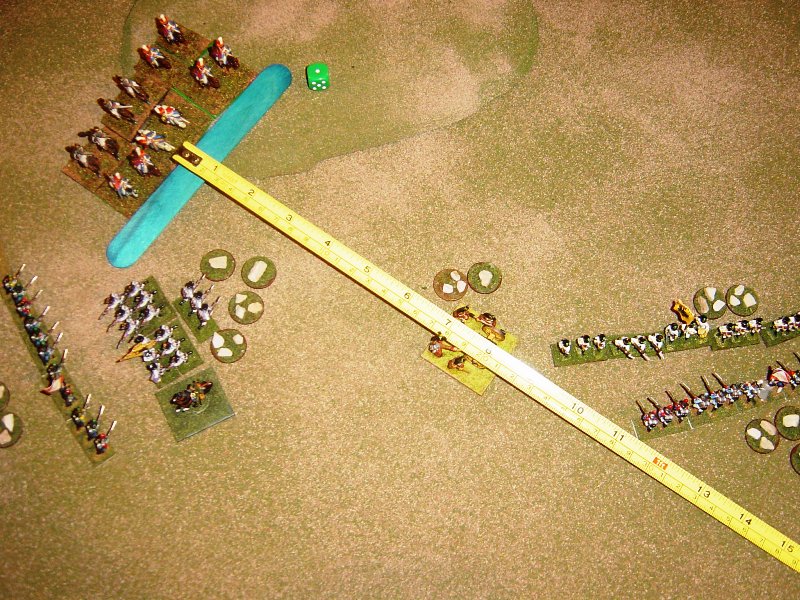
The French artillery unlimbers and the Austrians are still outside of musket range (2").

The Austrians did not move, so we go back to the beginning of the turn, Step 1.
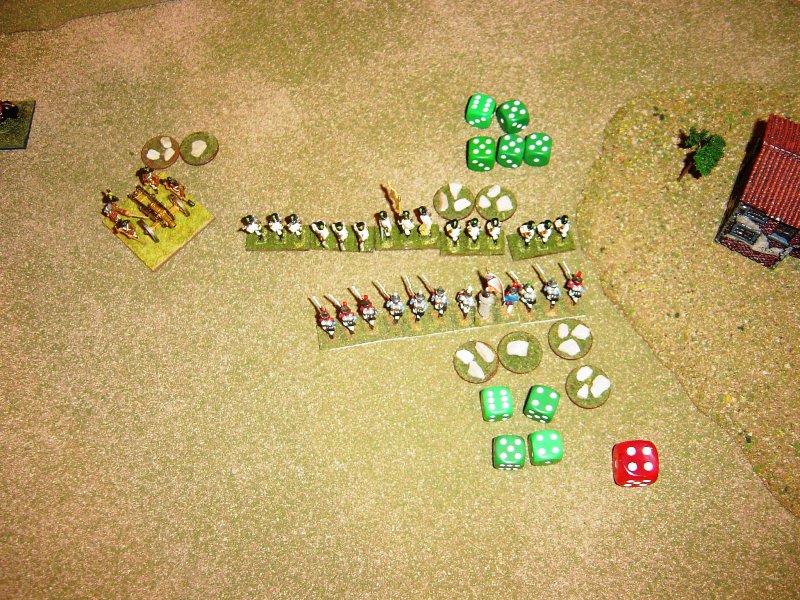
Now both sides fire artillery. With the units bunched up like this,
there should be a lot of targets under fire.
Both sides target two units.
The Austrians put one hit on the first French battalions (5+ to hit)
and two hits on the second battalion (same to hit, as it is in medium range).
The French guns need a "6" at medium range to hit the Austrian guns (5+ and -1 for 6 pounders)
and a 5+ to hit the column supporting the guns.
All units pass their morale tests. Artillery do not test morale.
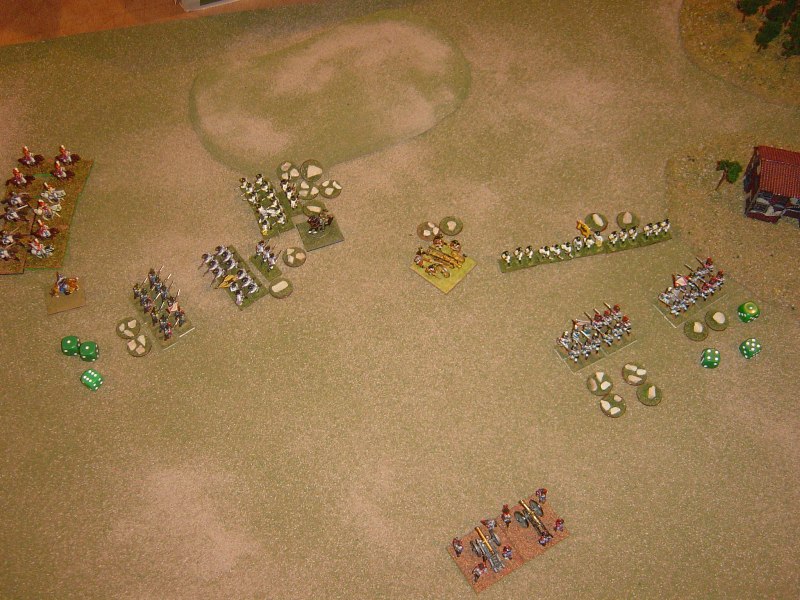
The French continue to advance, but are still outside of Austrian musket range.
The battalions out of command have fallen far behind and the cavalry has not been
able to advance as rapidly as normally possible.
In their movement (Step 8), the Austrians turn one battalion.
With no charges happening, the turn moves quickly.
Both sides fire artillery.
The French guns need the same numbers to hit as before and inflict two
hits on the Austrian artillery and three hits on the infantry behind it.
The Austrian guns roll seven dice now (lost one gunner from the hit on the
previous turn). They lay into the damaged French battalion at close range,
needing "4+" to hit. (4+ for target in column, +1 for close range, -1 for 6 pounder)
Three more hits go onto that target. The one behind it takes three more hits as well.
Once again, the Austrian guns need not test morale for being hit.
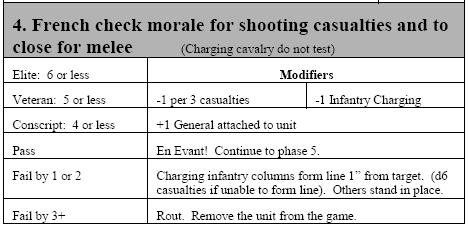
The Austrian infantry pass their morale check, needing a "4" or less (-1 for the casualties)
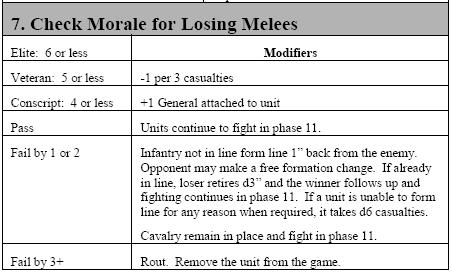
The leading French battalion fails by three (5 for veteran, -2 for casualties equals a morale
of 3.) The "6" is three more than the modified morale, so the battalion routs and is removed.
The second French battalion has a modified morale of 3 and fails by one, so it halts and cannot advance.
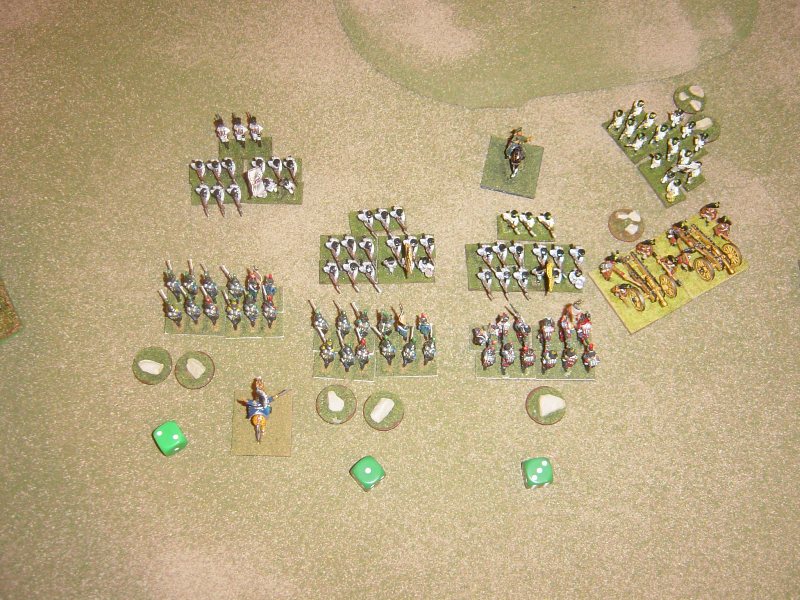
The one French regiment in command advances within musket range of the Austrians.
The Austrians fire one die per two figures in the front rank - or three dice per battalion
at the French. (If the Austrian artillery was aimed at the advancing French,
it would be able to fire like infantry - one die per two figures - as well.)
The French battalions pass their morale tests for being shot.
The battalion on the Austrian left turns in.

Even though they didn't move, during Step 8 the French battalions fire at
the Austrians to their front, needing a 4+ to hit columns.
All three Austrian battalions pass their morale tests for being shot.
Back to Step 1, both sides fire their artillery. Batteries must turn to face
their target and the Austrian artillery is now setup to fire during Step 3 as well.

Both infantry battalions pass their morale test.
The French columns charge and the Austrians fire. (I forgot to fire the artillery, but
it would have rolled two dice - figure remaining figures at one die per two figure.)
The French battalions check morale. Even though the battalion on the right did not
receive any damage, it still must test to close. The one on the left fails by one
and must form line 1" from the enemy. This is to represent the tendancy of a column
advancing on an enemy while under small arms fire to want to spread out and return fire.
This battalion is no longer able to manuever or change formation as it is locked in
a firefight with the enemy.
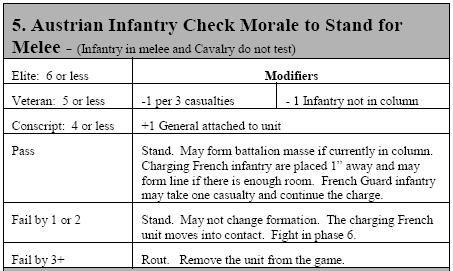
Since two of the French columns successfully charged home, the Austrians test to stand.
I actually messed this up badly (focusing to much on sequence of play and taking photos
than playing the game). The charging French columns should have stopped an inch away.
Oh well...we'll pretend the Austrians failed by one or two and carry on!
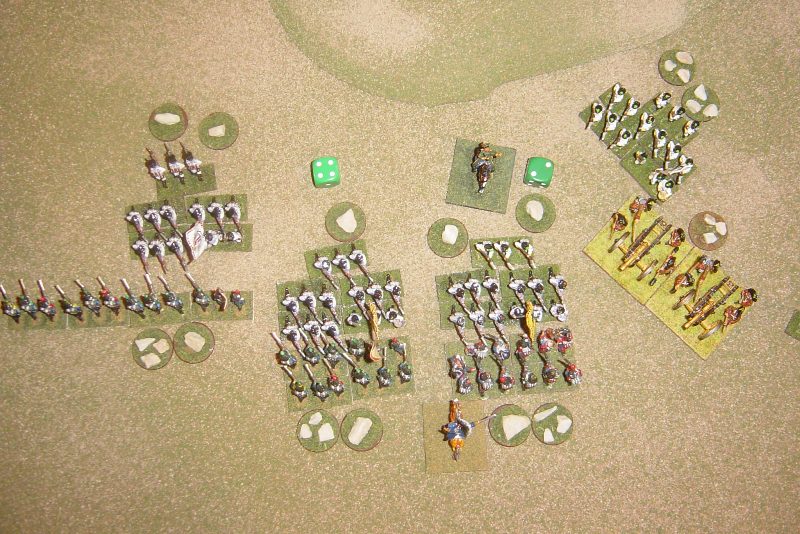
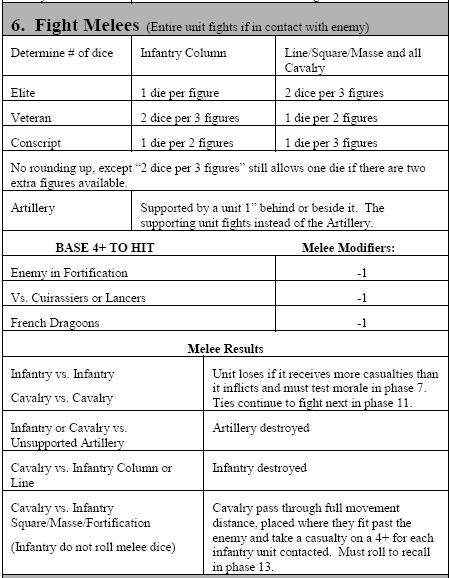
Now in melee, both sides roll combat dice needing 4+ to hit. The number of dice rolled
is based on the number of figures, formation and morale of the battalion.
Veterans in column roll 2 dice per 3 figures (not counting casualties of course).
Losers test morale. The French lost both fights because they took more casualties than
they received. The battalion on the right passes, but the one on the left fails by one.
The battalion that failed morale by one (5 or less, -3 for casualties, rolled a "3") must
form line 1" from the enemy. If there was not enough room for a line, an additional
d6 casualties would be inflicted!
In Step 8, the Austrians move while the French shoot.
Artillery fire again. The French cannot fire on multiple targets because their own battalion
is in the way.
The French battalion passes morale (barely).
French movement and Austrian shooting.
The battalion on the left fails morale by two and must stand in place, but it is locked
in a firefight and can't move anyway.
The battalion in the center FAILS by three, routs, and is removed from the table.
The one remaining combat continues and the Austrians inflict enough casualties
to automatically break the French battalion (when the number of hits equals the
number of figures, a unit routs and is removed from the game).
French fire during the Austrian movement phase (Step 8).
The Austrian battalion in Masse fails morale by three, and routs.
Back to Step 1, the French can again hit two targets. If the second Austrian battalion
was on the hill it could not be hit by bounce-through, as the artillery and all targets
must be on level ground.
The leading Austrian battalion, already beaten up in heavy fightin, fails morale
by three and routs from the table.
The French cavalry advance up the flank while the last two battalions
close the distance with the Austrians. Only about three stands were in range
to shoot at the French.

And the target unit passes morale.
Austrian moves - the French fire back.
The line passes morale, but the Masse battalion fails by one. It cannot move anyway.
More artillery fire.
Notice the Austrian battery is down to one model. We sometimes (but not always)
will remove a gun model when half of the figures are hit.
Both targets fail and rout from the artillery fire!
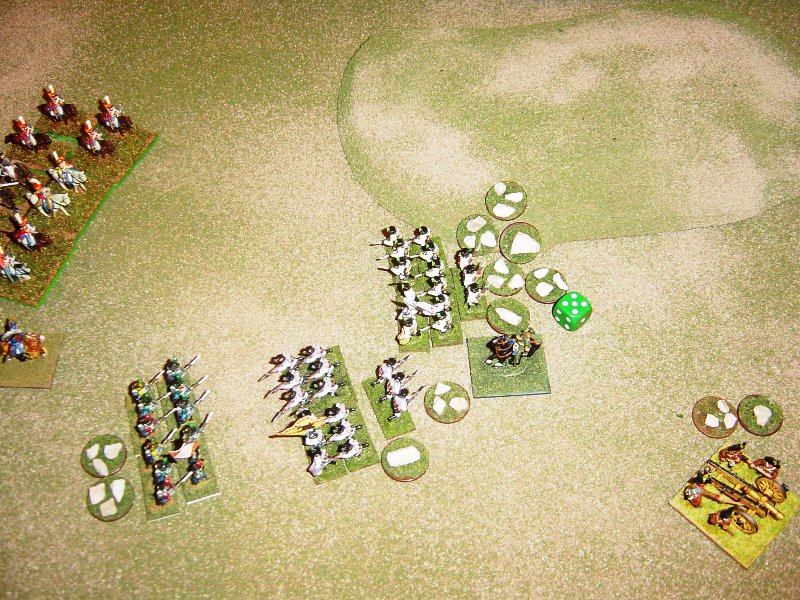
One French battalion charges the line and the Austrians shoot.
The Hussars line up for a charge.
The charging column passes morale and the French battalion in line barely passes
(thanks to the general being attached).
Again I mess it up, testing for the Austrians and allowing the French to close.
In the next round of combat, the Austrians defeat the column by one hit.
The French battalion fails morale by two and is forced into line.
The French fire on the Austrians during their movement. I'm really messing up
the battalion on the right should have rolled one die to shoot.
The Austrians in Masse pass morale.

Artillery fire. The French battalion on the right is one hit from routing automatically.
Both targets fail by two - barely surviving. The Austrian general keeps his battalion
in the fight, or it would have routed. (We do not have leader casualties..no room on the QRS.)
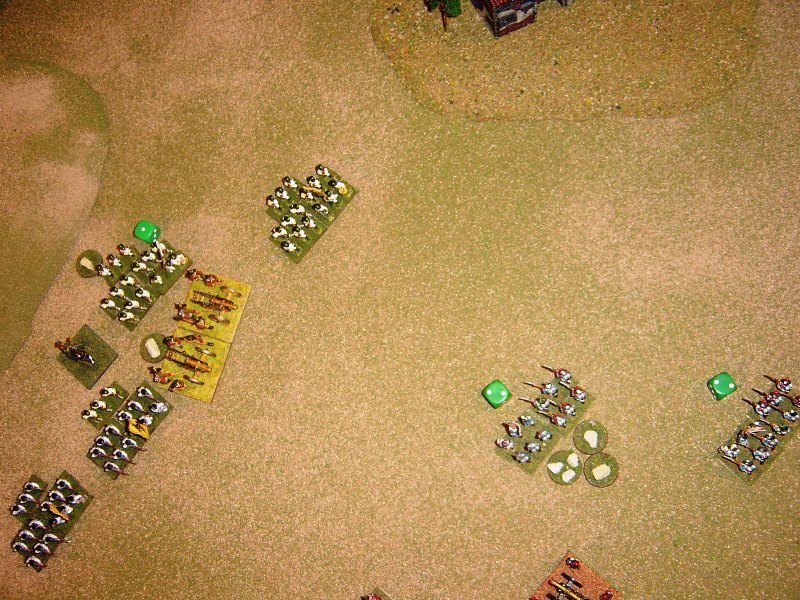
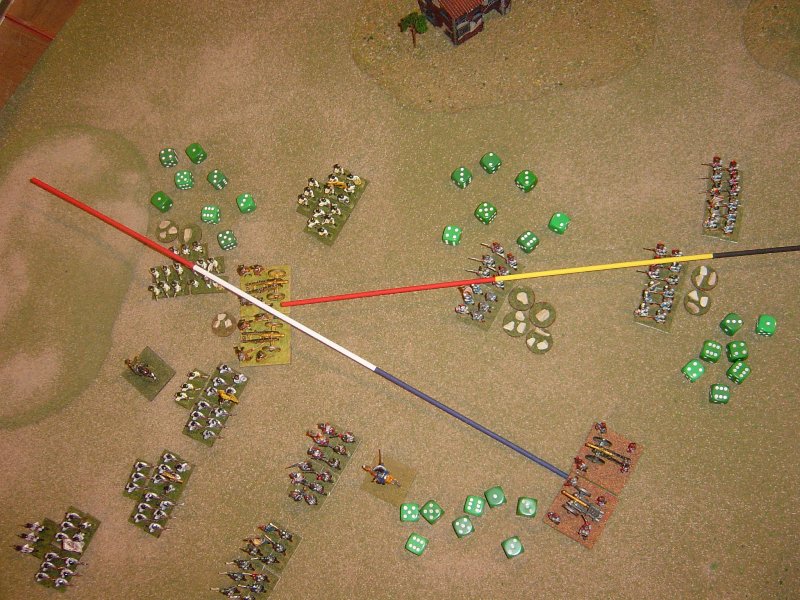
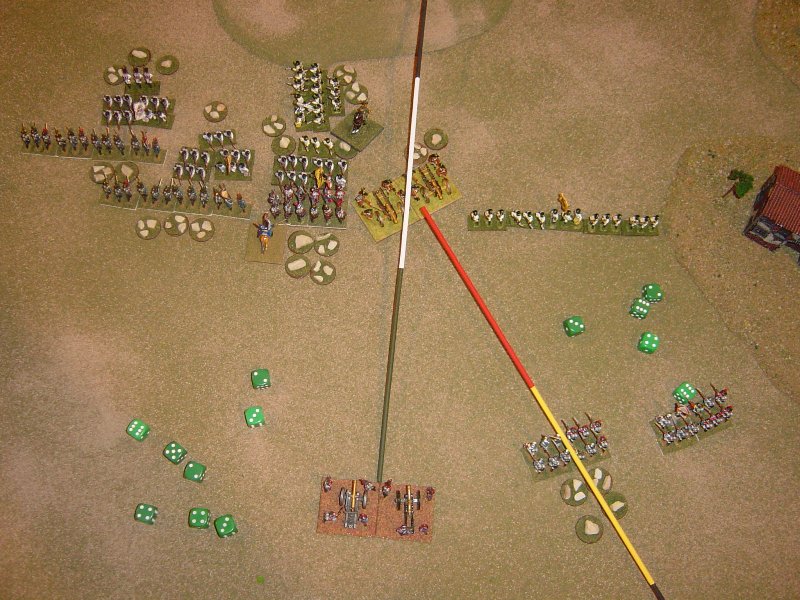
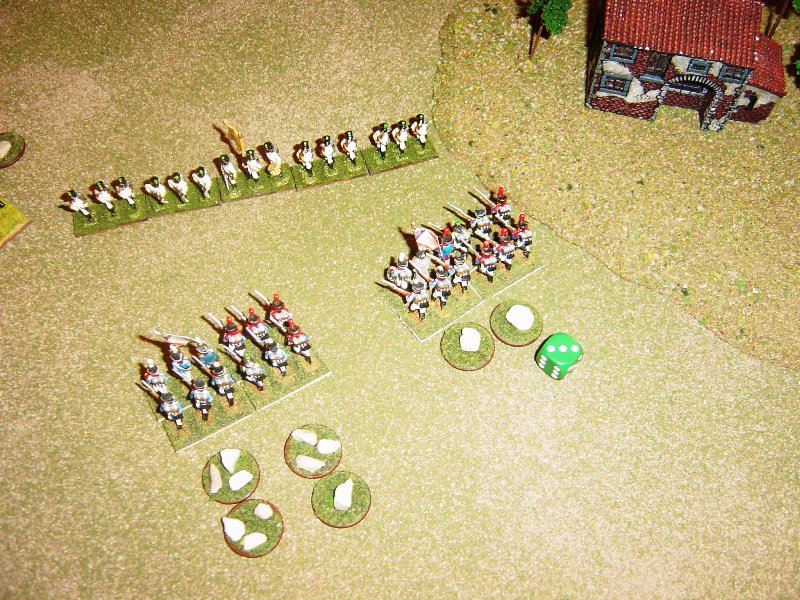
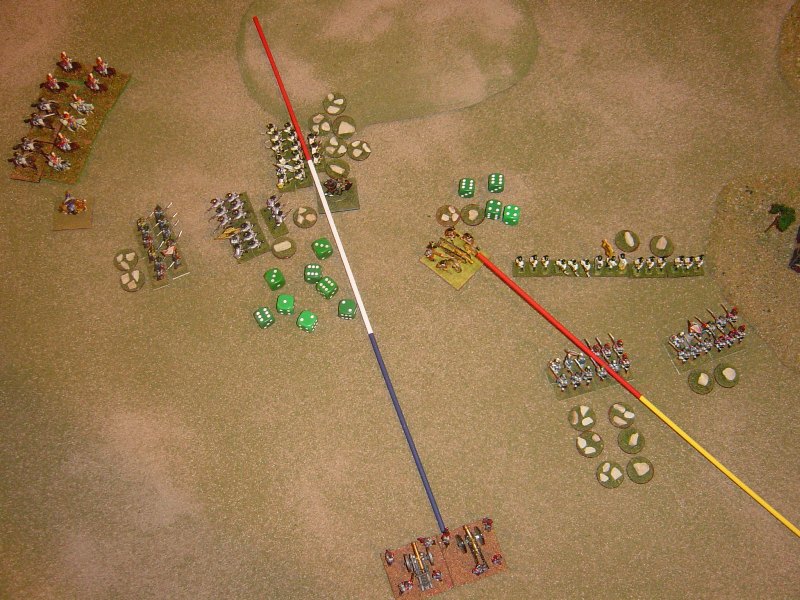
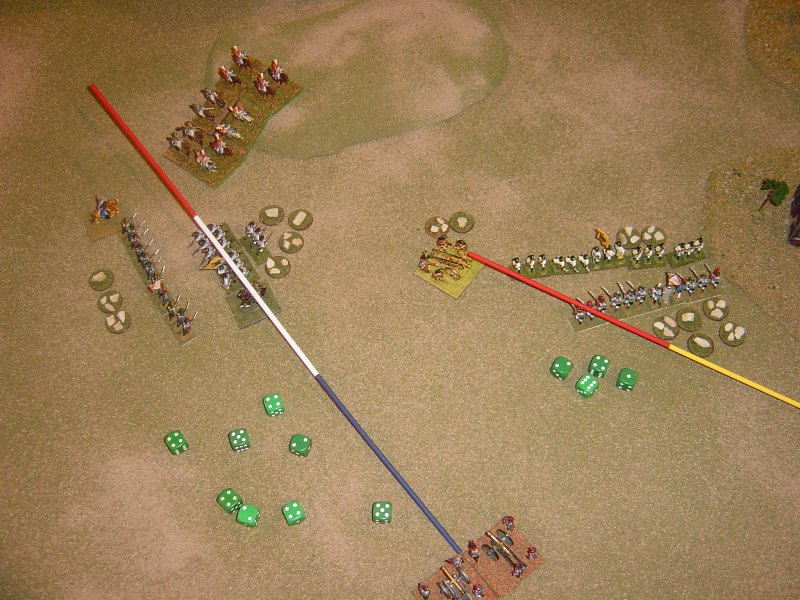
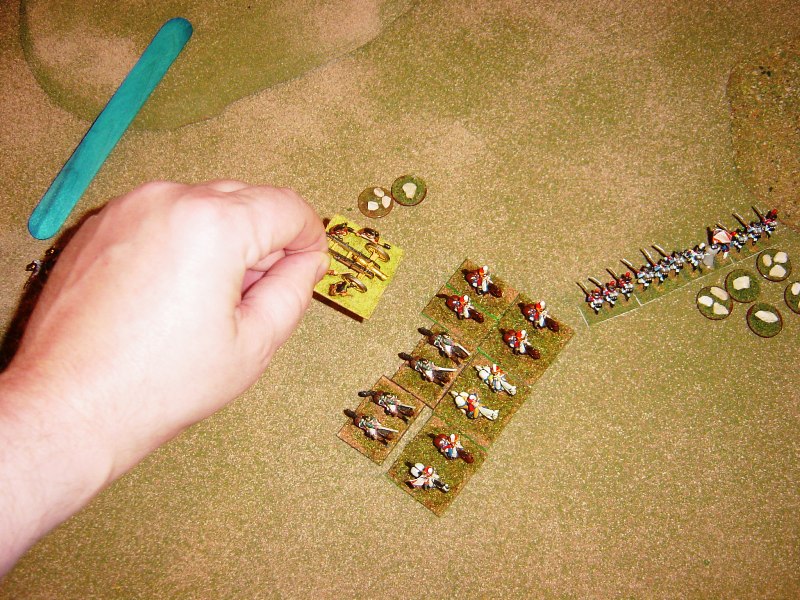
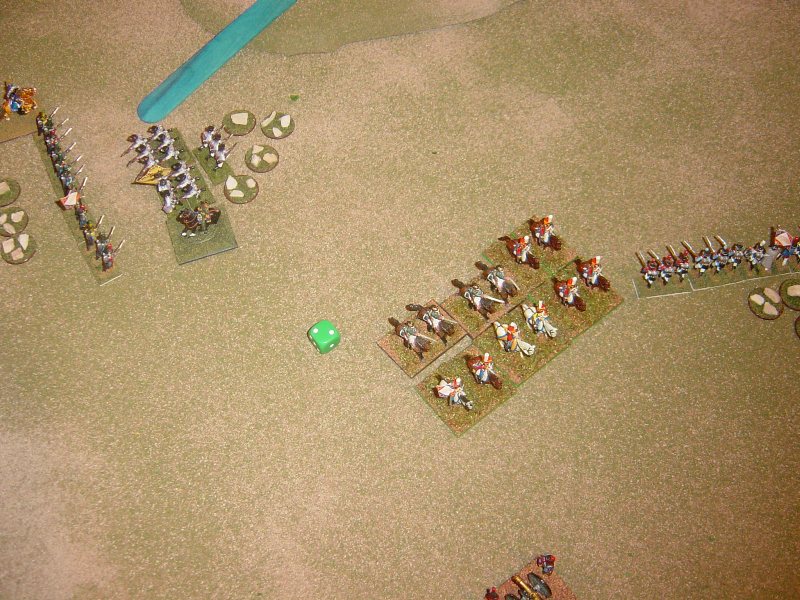
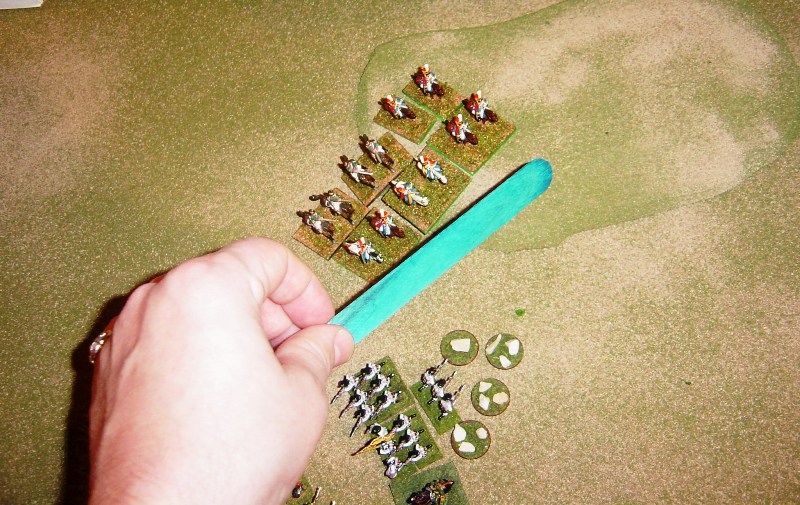
CAVALRY CHARGE! I'm glad this happened (was a bit worried if it would).
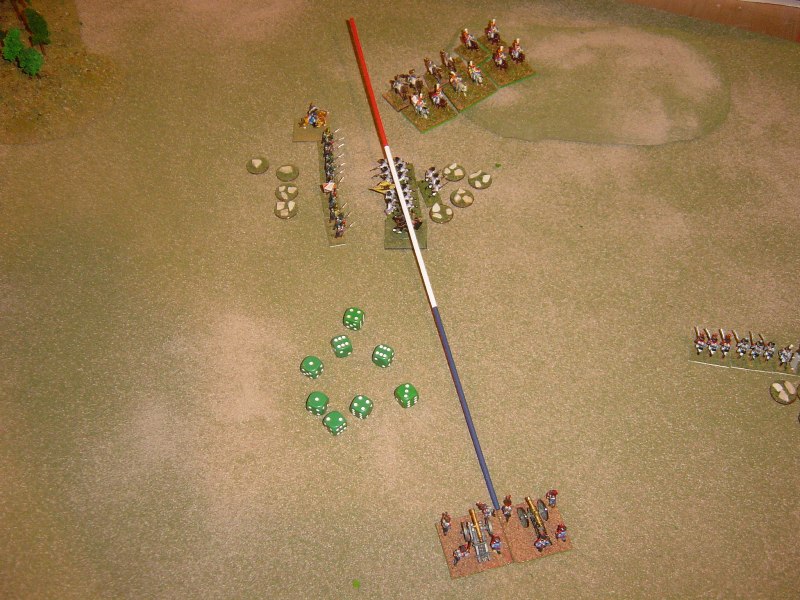
The procedure is to put a marker down in front of the cavalry unit (the blue stick).
It will move it's normal move (7") plus 1d6"...in this case, 8". You can see this puts
it in the middle of the Austrian artillery unit. The charge also MISSES the Austrians in Masse.
The cavalry are placed past the target where ever they will fit. They did not hit the
Austrian battalion in line.
The Austrians shoot at the French battalions. The battalion on the right is lucky not to be hit.
The French unit fails by two, but stills stays in the fight.
The Austrian artillery unit is SUPPORTED by having the battalion in line 1" from it.
This means that the infantry will fight the cavalry. It also means they must test for
being charged. They fail the test by three and not only can't form MASSE, they just rout!
The Artillery battery is not supported. It is automatically routed.
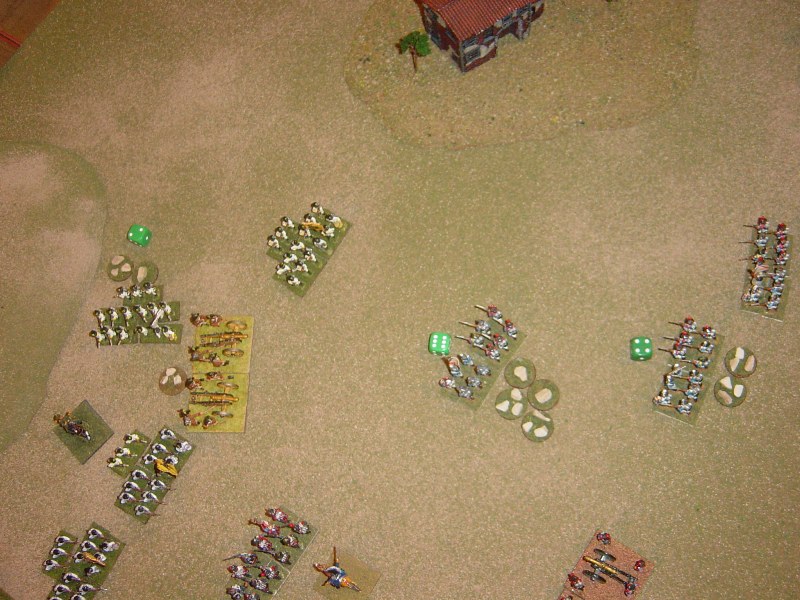
French shooting at the Austrians.
The one remaining Austrian unit refuses to rout!
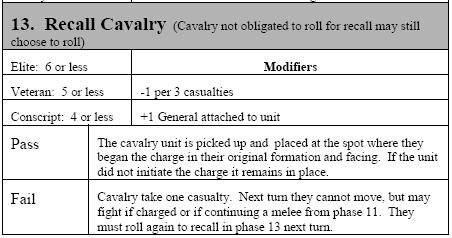
In Step 13, all cavalry that charged will test to RECALL back to the starting point
of their charge. If they fail, they just remain in place and can't move. This prevents
charges from being used for extra movement. Cavalry charges are powerful, but you
must set the up properly for them to work. Here, the unit passes with a "2".
It is returned to the starting point of the charge and the marker is picked up.
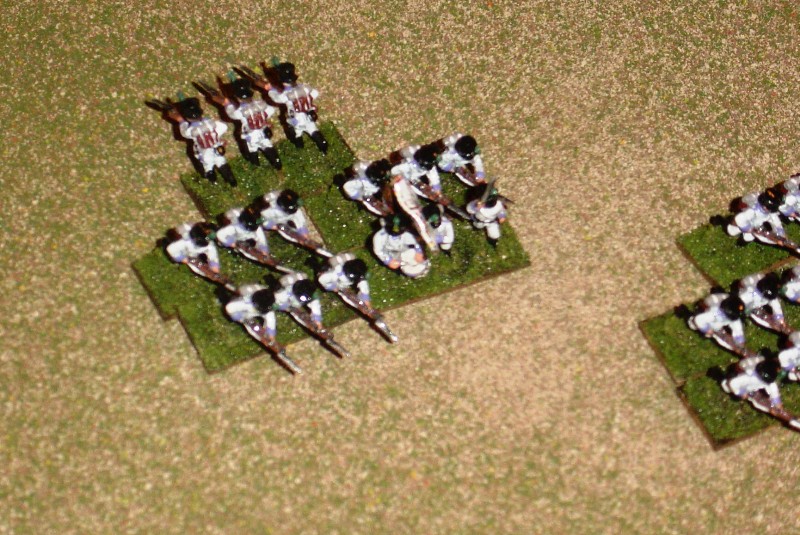
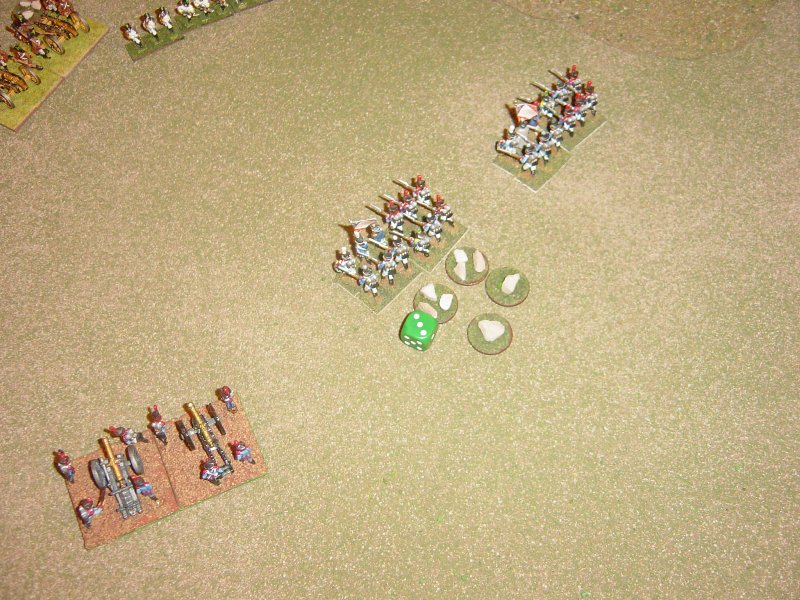
The poor surviving Austrian battalion doesn't have a chance.
Blurry photo - but it fails morale by three...and routs.
The battle is over. The French almost ran out of infantry, but the guns and cavalry
definitely made the difference in this fight.